How to Make a Simple Flower Press from Scrap Wood
If you enjoy gardening, crafting, or preserving special memories from nature, a flower press is a simple project that can provide years of enjoyment. The best part? You can build one yourself using scrap wood and a few inexpensive pieces of hardware.
Whether you’re preserving flowers from your garden, creating botanical artwork, or saving blooms from a special occasion, a homemade flower press is an easy weekend project that requires only basic tools and materials.
Why Make Your Own Flower Press?
Store-bought flower presses can be expensive, but a DIY version works just as well and can be customized to any size you need. Using scrap wood also makes this an environmentally friendly project by giving leftover materials a new purpose.
A flower press works by applying even pressure to flowers and leaves while they dry, helping them retain their shape and color for use in crafts, greeting cards, framed art, bookmarks, and more.
Materials Needed
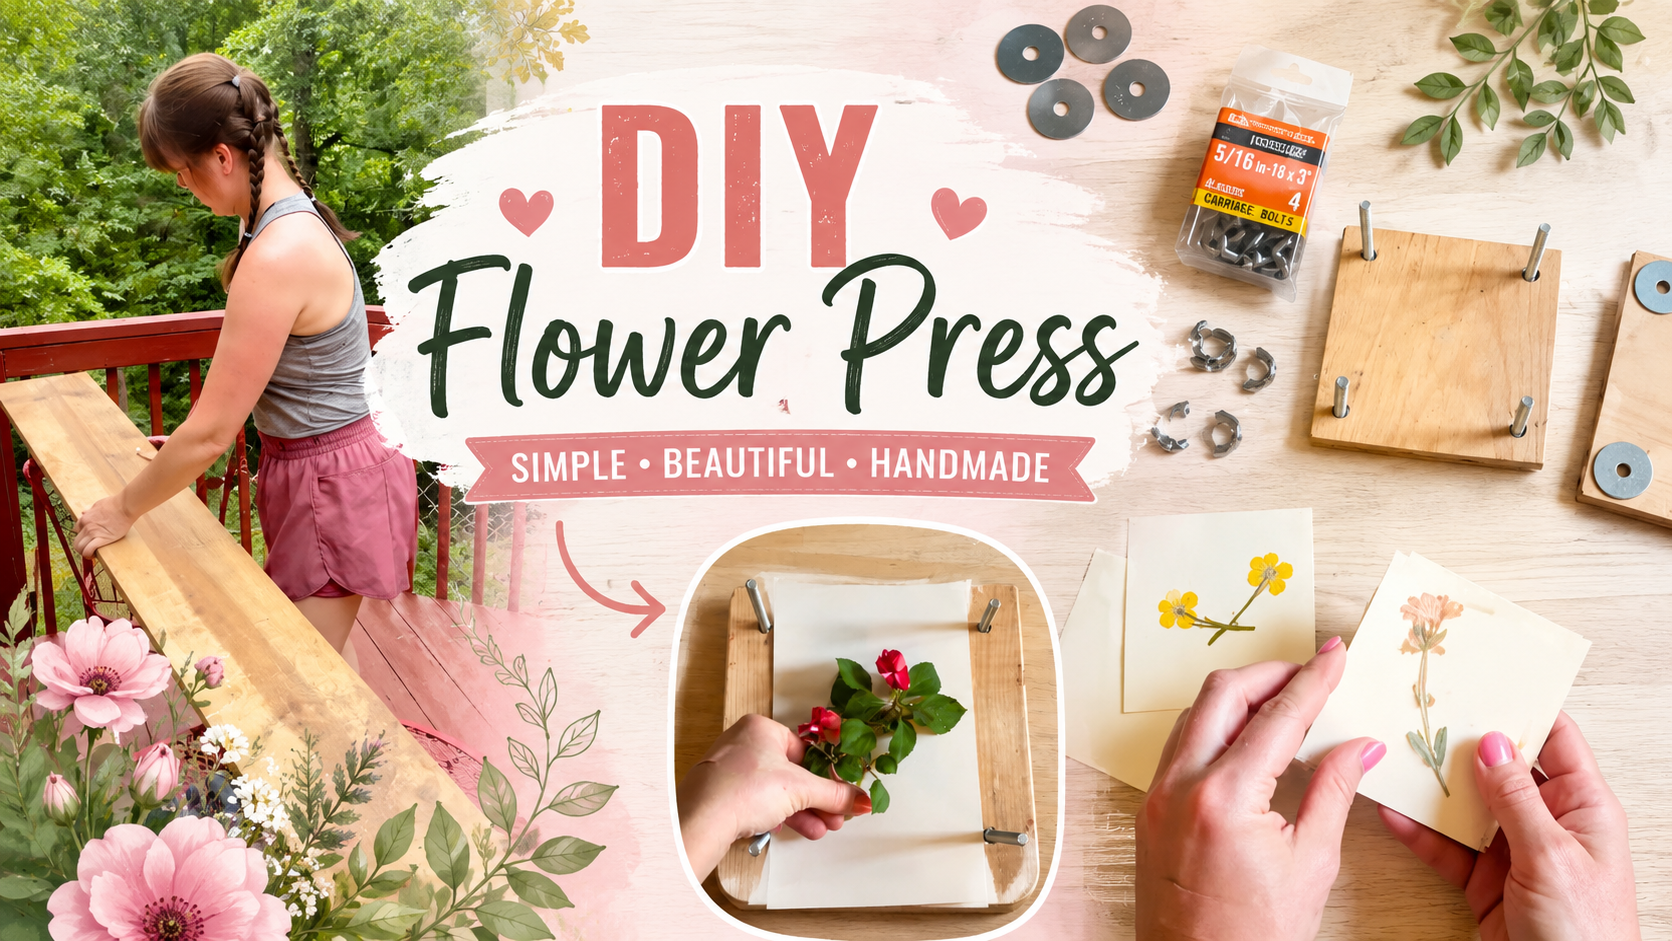
Wood
- Two pieces of scrap wood cut to the same size (approximately 8″ x 10″ works well)
Hardware
- 4 carriage bolts
- 8 washers
- 4 butterfly nuts (wing nuts)
Additional Supplies
- Cardboard sheets
- Blotting paper, newspaper, or parchment paper
- Drill and drill bit sized for your carriage bolts
- Sandpaper (optional)
Building the Flower Press
Step 1: Prepare the Wood
Cut two matching pieces of wood. Sand the edges if desired to create a smoother finish.
Watch Step 1: Prepare the Wood
Step 2: Drill the Holes
Stack the two boards together and drill a hole through each corner. Drilling both pieces at the same time ensures the holes line up perfectly.
Step 3: Install the Hardware
Insert a carriage bolt through each corner. Place a washer on each bolt before attaching the butterfly nuts. The washers help distribute pressure and protect the wood from wear.
Watch Step 3: Install the Hardware
Step 4: Create the Pressing Layers
Cut pieces of cardboard and blotting paper to fit inside the press. Alternate layers of cardboard and paper to create spaces where flowers can dry evenly.
Watch How to Use a Flower Press: Part 1
How to Press Flowers
Place flowers between sheets of blotting paper or newspaper. Arrange the petals carefully because they will dry in the position they are placed.
Stack the layers inside the press, place the top board on, and tighten the butterfly nuts evenly. The pressure should be firm but not so tight that it crushes delicate blooms.
Store the press in a dry location for two to four weeks, depending on the thickness and moisture content of the flowers.
Watch How to Use a Flower Press: Part 2
Watch Checking on the Pressed Flowers
Creative Uses for Pressed Flowers
Once your flowers are fully dried, you can use them for:
- Handmade greeting cards
- Framed botanical artwork
- Journals and scrapbooks
- Bookmarks
- Resin crafts
- Wedding keepsakes
- Gift tags and packaging
A Simple Project with Beautiful Results
Building a flower press from scrap wood is an affordable and rewarding DIY project. With just two wooden boards, four carriage bolts, washers, and butterfly nuts, you’ll have a durable tool that can preserve flowers and leaves for years to come.
The next time you have leftover wood in the workshop, consider turning it into a flower press. It’s a practical project that transforms ordinary materials into something that helps preserve the beauty of nature.